Persistent Disk Resize on the FLY
How many times you have to stop your VM and attach a new disk when you ran out of space and training and testing a model.
To resolve this ,here is the small article with commands.
It only applies on common case. The entire disk is reserved for a single partition.
Step 1: Go to URL console.cloud.com select the project and click on the cloud shell.
To get the full view, write command
$export PS1=”$”
Step 2: Then Write Command
$ gcloud compute ssh 1 — zone=2
· 1 — Put the compute engine name in place of 1.
· 2 — Put the zone details in place of 2.
Step 3 : Remaining disk size available
$ df -h
Filesystem Size Used Avail Use% Mounted on
udev 1.8G 0 1.8G 0% /dev
tmpfs 371M 39M 332M 11% /run
/dev/sda1 50G 11G 38G 22% /
tmpfs 1.9G 0 1.9G 0% /dev/shm
tmpfs 5.0M 0 5.0M 0% /run/lock
tmpfs 1.9G 0 1.9G 0% /sys/fs/cgroup
/dev/sda1 is the line we are looking for. From the example above, you have noticed that you have used more than 1/4 of the disk size.
If the rate of use is over 80%, that’s not a good sign.
Step 4: Partition Check
$ sudo lsblk
NAME MAJ:MIN RM SIZE RO TYPE MOUNTPOINT
sda 8:0 0 50G 0 disk
└─sda1 8:1 0 50G 0 part /
Noticing that sda only has one partition sda1, which is actually good as it makes things simpler.
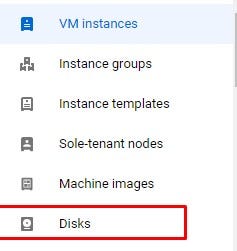
Step 5: Go to the console and click on disks under the compute engine.

Select your VM and click on edit. Enter the size you want to increase.
Step 6: Now that you have increased the size however you still need to grow the partition.
$ sudo growpart /dev/sda 1
CHANGED: partition=1 start=2048 old: size=*** end=*** new: size=***
,end=***
Asterisk are just a size for indication from start to end.
Step 7: The file system needs to resize.
sudo resize2fs /dev/sda1
resize2fs 1.42.13 (17-May-2015)
Filesystem at /dev/sda1 is mounted on /; on-line resizing required
old_desc_blocks = 13, new_desc_blocks = 63
The filesystem on /dev/sda1 is now **** (4k) blocks long.
Step 8: Verify by command
$ df –h
This is it, Enjoy!!
